Fursuiters in action

HOW TO MAKE A DTD

How to make a perfect Duct Tape Dummy for your fursuit

WHAT IS A DUCT TAPE DUMMY?

A DTD, or Duct Tape Dummy, is a mannequin made on your own body using Duct Tape. It's essential to make a bodysuit with the correct size and fit for the individual client.

Since a DTD is required for a fullsuit/bodysuit, we kindly ask for it to be sent in a timely manner to avoid delays in the making of the suit!

Badly made DTDs won't be accepted and we may ask to remake it if we are not able to work with them. Be sure to follow these instructions carefully!

Materials required

To properly make a Duct Tape Dummy, you will need these supplies:

  • Disposable painters suit/coverall
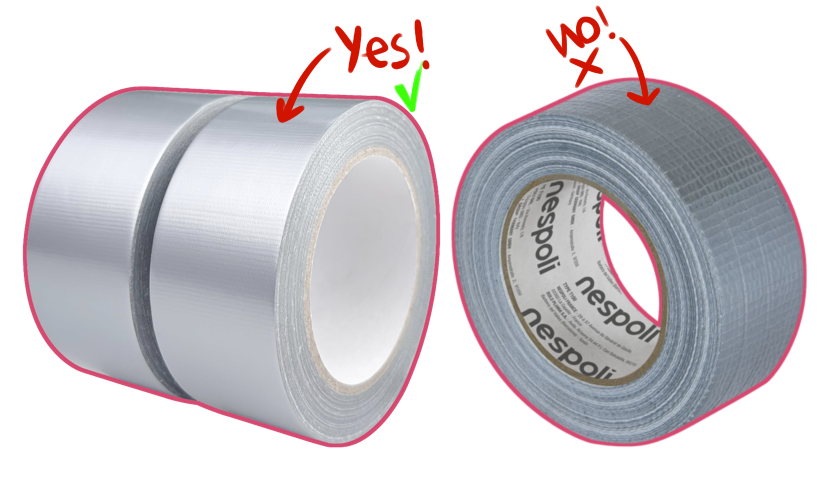
  • High quality Duct Tape (3-5 big rolls)
  • Scissors (possibly with rounded tips)
  • Permanent marker
  • Plastic bags or paper towels
  • One or more friends to help
Required supplies for making a Duct Tape Dummy: painter coverall, duct tape rolls, scissors, marker, and plastic bags

BEFORE YOU BEGIN

  • You will need one or more helpers, you physically can't make your own DTD by yourself.
  • Read these instructions carefully, and make your helpers read them too.
  • Do more layers of tape and change the direction of the stripes, otherwise THE DTD WILL FALL APART!
  • DO NOT TAPE DIRECTLY FROM THE TAPE ROLL TO YOUR BODY, IT CAN BE DANGEROUS!
  • Don't leave untaped holes in the DTD and don't make the layers too thin.
  • Reassemble the dummy after you finish. Do not send it open please!
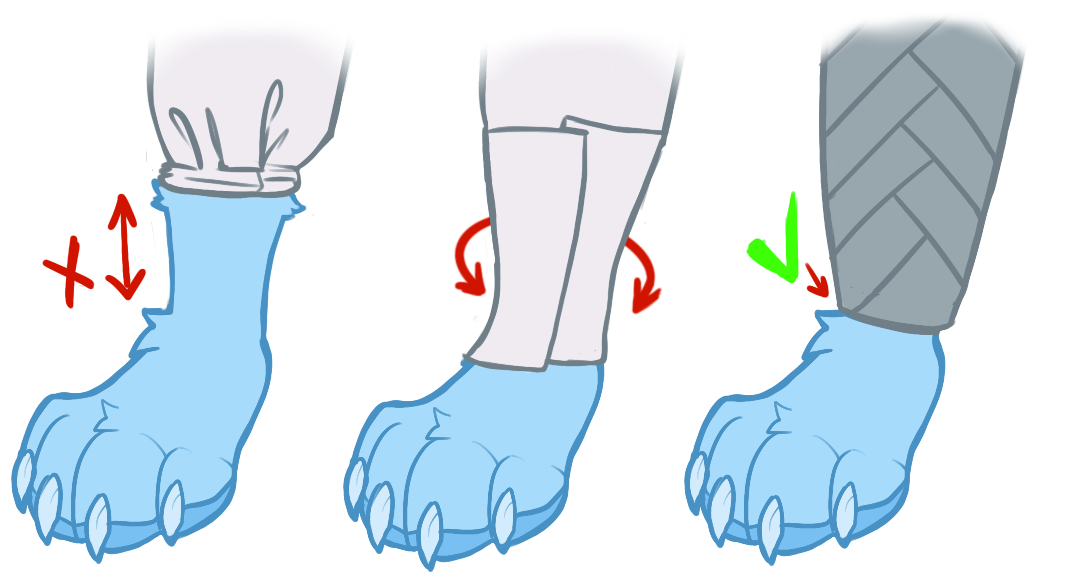
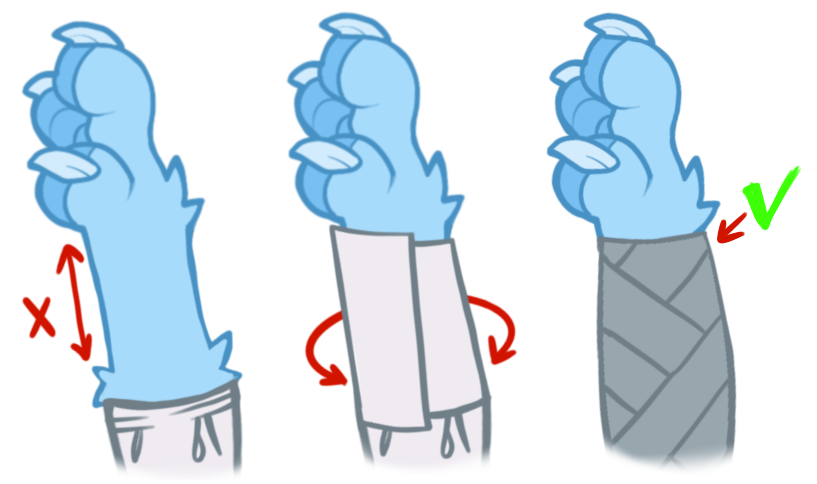
  • Tape your wrists and ankles properly.
  • We ask for the left foot to be covered.
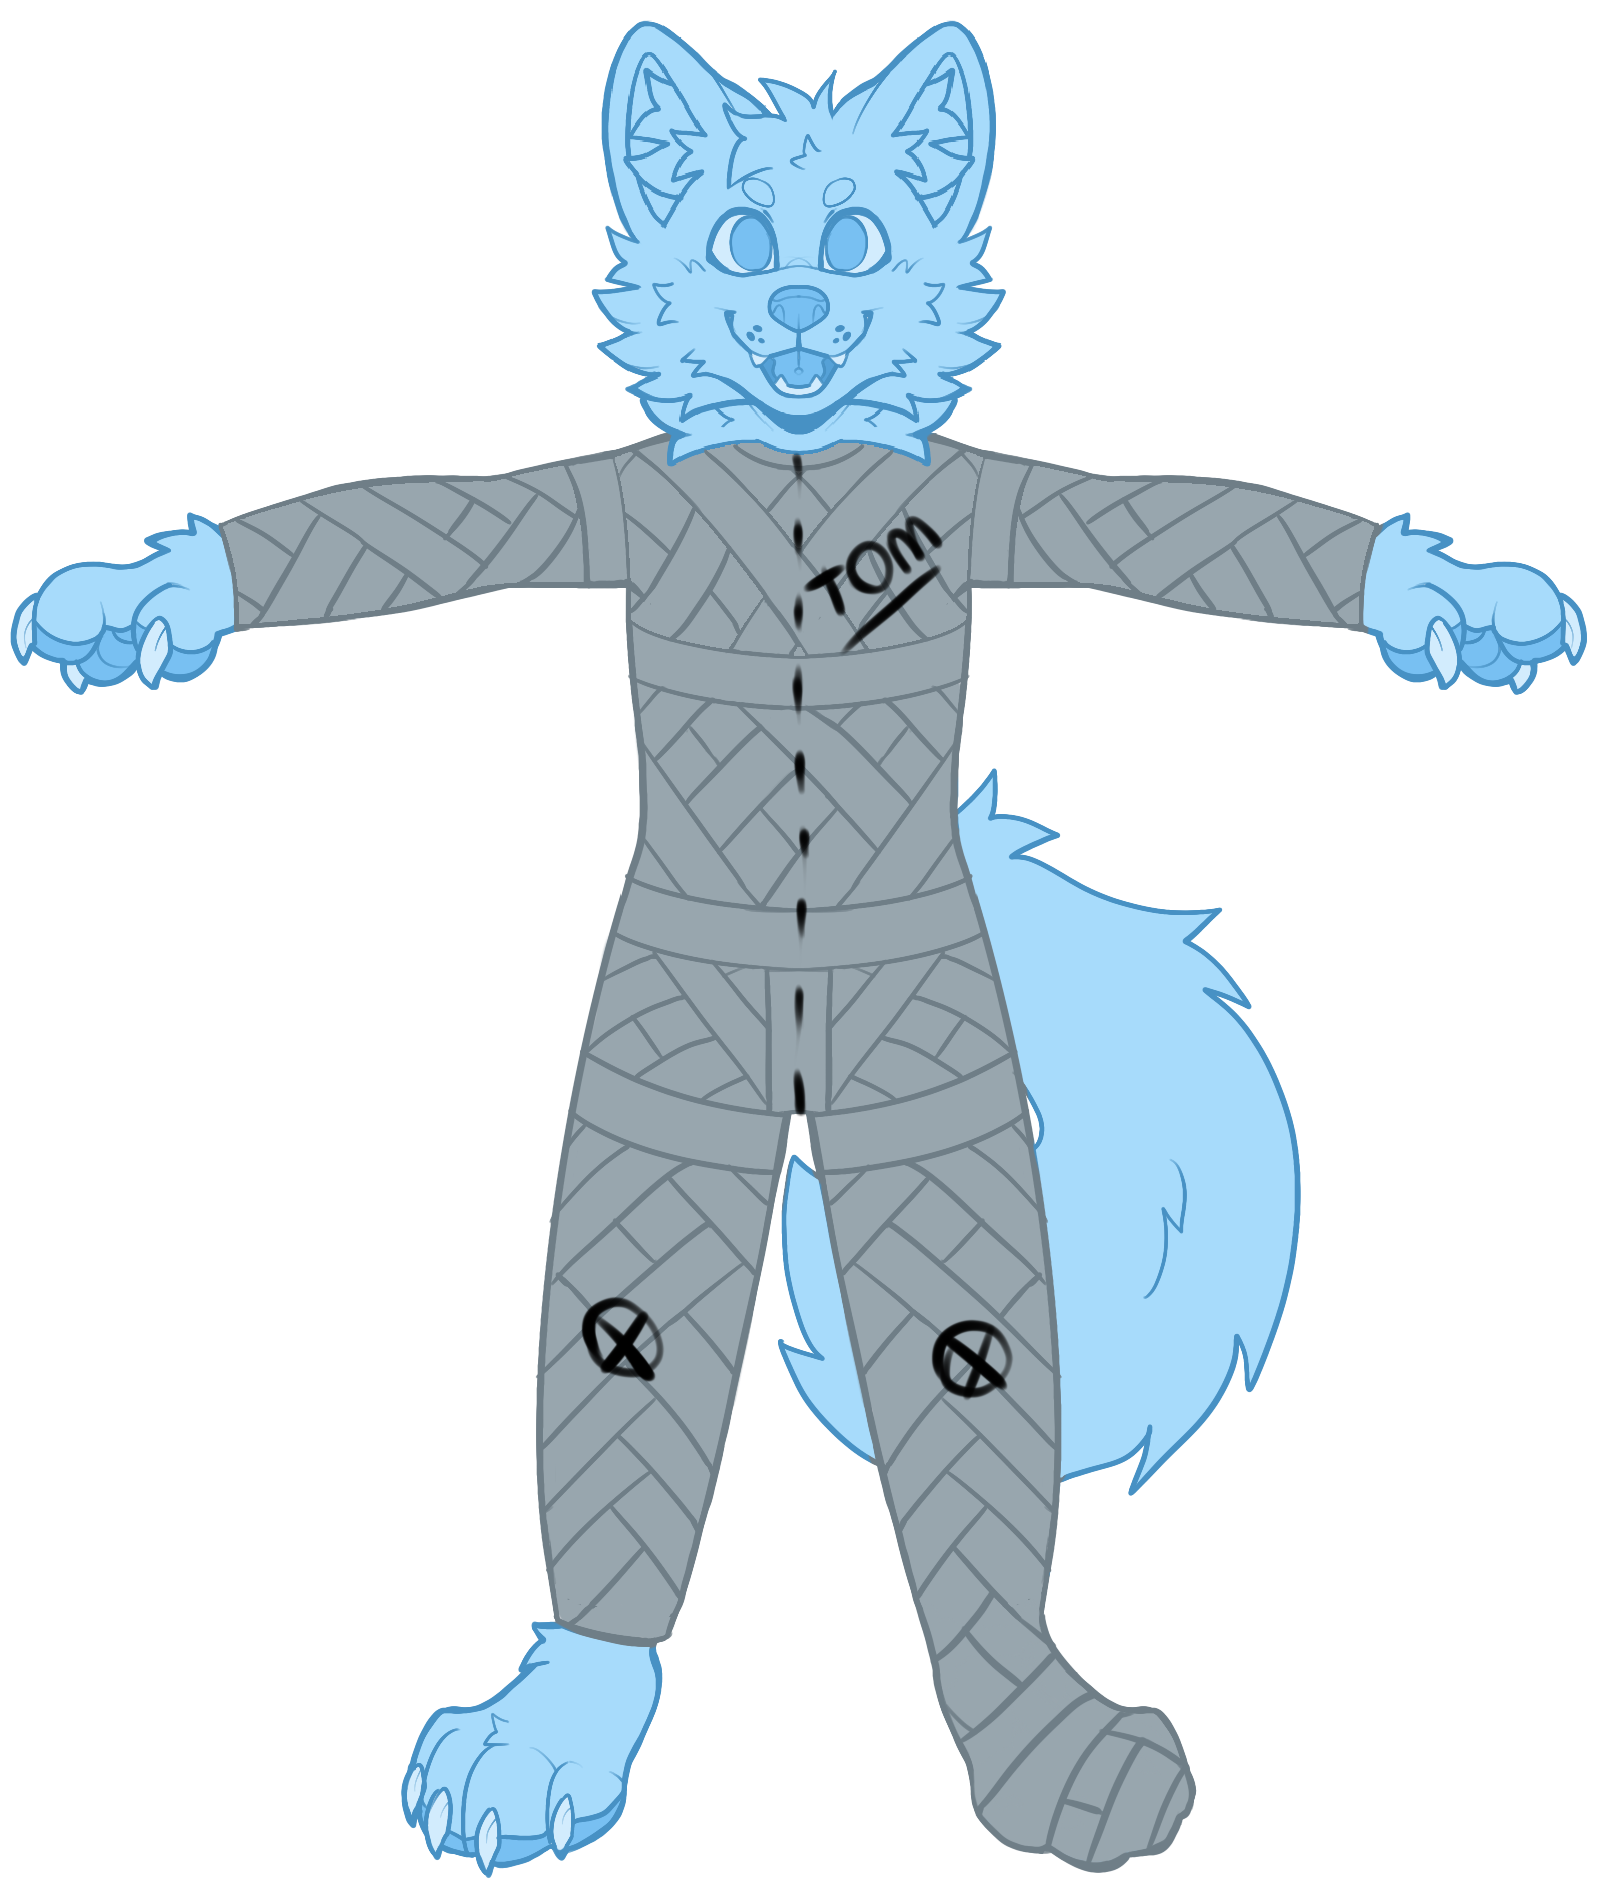
  • Please, remember to write your name and mark the position of tail, elbows and knees on your dummy once you're done.
  • Use an HQ duct tape, or the dummy will fall apart! We added an exaple of HQ and LQ tapes below.

STEP 1: Prepare yourself

The making of a DTD could require 1-3 hours from start to finish, so be sure to drink enough water and eat a proper meal before starting.

Go to the bathroom, and wear clothes that you are not worried about getting cut. Don't wear hoodies or bulky clothes!

We suggest you make the DTD in a well-ventilated and cool room, as you will sweat a lot while covered in tape!

If you are not feeling well during the taping process, let your helpers know, take a break and drink water!

STEP 2: Start taping

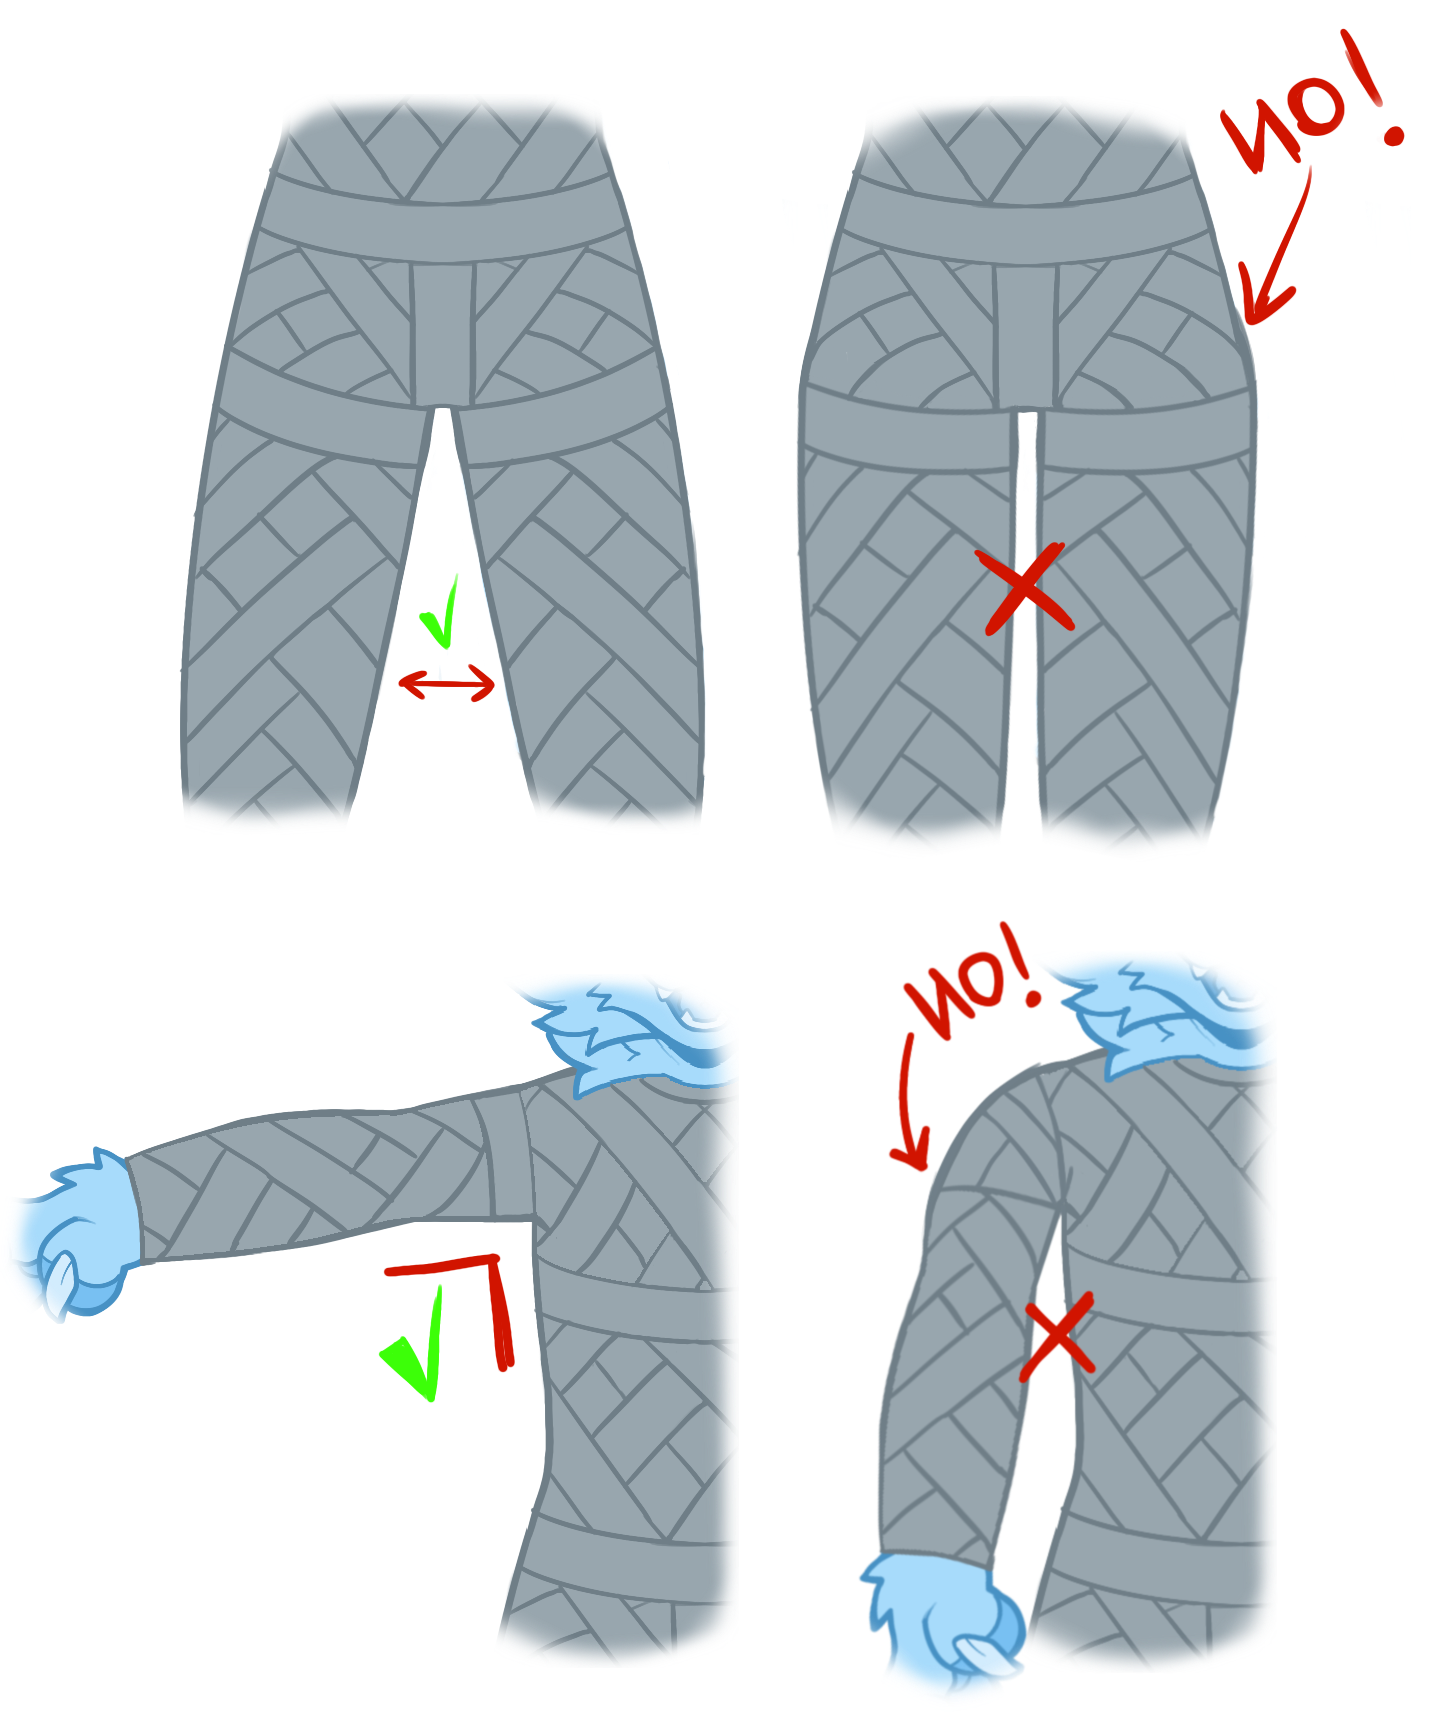
Wear your painters suit and get into position. It's really important that your arms are in T-pose, and keep your legs spread. Use a broomstick or something similar to help keep your arms in that position, and do not slouch!

  • Start taping from the crotch and the chest parts, making something like an harness. This will keep the painter's suit in place while you tape the rest.
  • Don't start from ankles or wrists.
  • Remember to apply multiple layers during the entire process. This will avoid untaped parts and a too-thin DTD.
Initial tape harness across chest, shoulders, waist, and crotch to secure the coverall

STEP 3: Taping the torso

  • Start taping from the crotch to the torso. Be sure to use small stripes of tape, and place them randomly, not all on the same direction. Do not apply the tape from the roll directly, but first cut it in stripes and then apply them one by one.
  • Do not thighten too much, your friend still needs to breathe ;3
  • Be sure to keep a straight back while taping. Slouching will cause your fursuit to be too short.
Taping the torso with overlapping duct tape strips in alternating directions

STEP 4: Taping the legs

  • Now spread your legs, but not too much. Your heels should be positioned just past the length of your shoulders.
  • Cover the full left foot, or just the half if you prefer. This step is necessary for us to make a perfect connection between feetpaws and legs.
  • Use an old sock instead of the plastic bag if you prefer, but keep in mind that it will be cut once the DTD is done.
Taping the legs down to the ankles and fully covering the left foot
Close-up showing the left foot completely wrapped in duct tape

Once you taped the legs and reached the ankles, use a plastic bag or paper towels to cover the exposed skin. Do this step if your painter's suit is too short. Do the same process for wrists!

STEP 5: Taping chest & arms

  • Once you taped the legs and the left foot, start taping the chest and arms.
  • Keep using a broomstick or something similar to help keep your arms straight in T-pose.
  • Do not slouch and keep your shoulders back.
  • Keep your palms facing downwards and tape the wirsts tightly.
  • Tape slightly past to your wrists. If you want, you can also tape half of the hand. Use a disposable glove to do this process.
Torso, arms, wrists, legs, and left foot fully covered in duct tape in T-pose

Optional:

You can also tape your neck. This step is optional, but it can help us for zipper and neck placing.

  • Carefully cover the neck with a plastic bag, then tape it.
  • DO NOT TAPE TIGHTLY!

STEP 6: Cut off the dummy

Once you taped everything and made sure you closed every untaped spots, you are ready to be released!

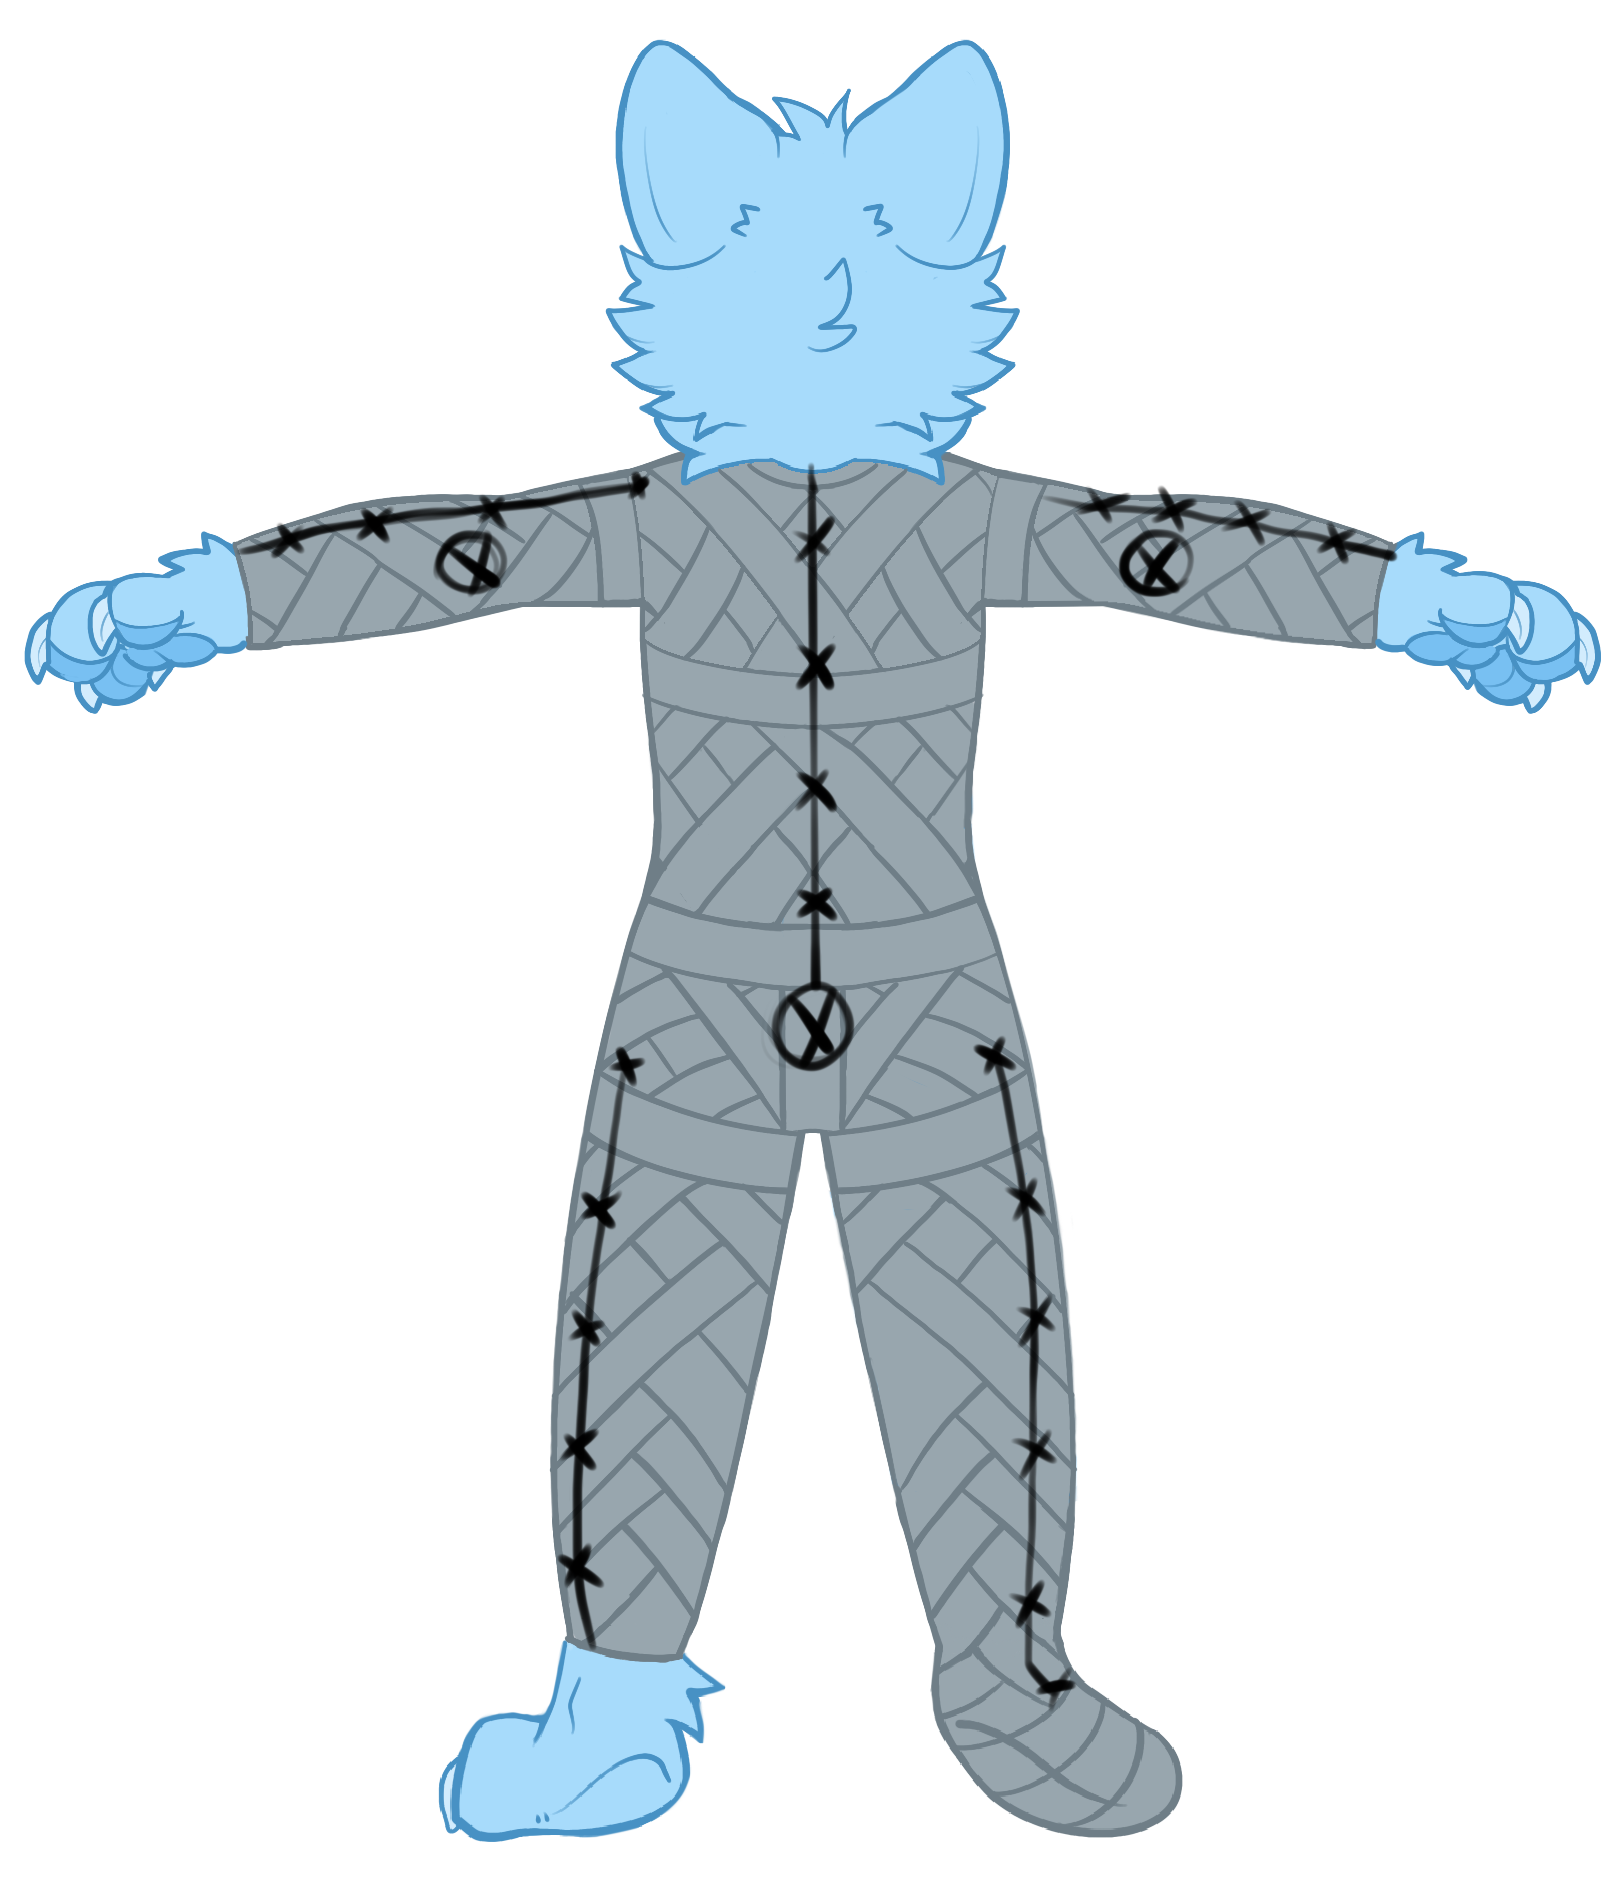
  • Mark the position of elbows, knees and tail position on the DTD and write your name on it.
  • You can also mark the center of your chest and back. This will help us be more precise when working on the bodysuit.
  • Mark some lines as shown on the pic, and add some X markings on them. They will help to tape back the dummy later.
  • Start cutting from the upper part of the dummy, to free the arms and chest first.
  • After that, free the legs by cutting on the lines you marked previously.

Use scissors with rounded tips! Work slowly and carefully, to avoid cutting clothes or skin.

STEP 7: Tape back and ship!

  • Once you are finally free, tape the dummy back into shape by following the X markings you made previously. Be sure to align both sides of the cut dummy, before taping them back together. The X markings are there exactly for this.
  • Fold and pack everything for shipping. You don't need to fold it in a specific way, just make it as small as possible for a better and cheaper shipment.

Remember to tape the DTD back before shipping and mark your name on it!

STEP 8: Ship it out!

Now that everything is done and packed, it's time to ship the DTD to us.

Shipping costs are under the customer's responsibility.

Timing of the shipment is also really important! Be sure to make your DTD and send it in a timely manner to avoid delays in the making of the suit!

WARRANTY AND SHIPPING

For a better representation of how to make a DTD, we suggest watching this video. It explains visually the process step by step.

Watch Video Tutorial